Video Conferencing Room Design: How to Set Up Rooms That Actually Work
Video conferencing room design basics — camera placement, microphones, acoustics, displays and network — so meetings stop failing on audio and video.
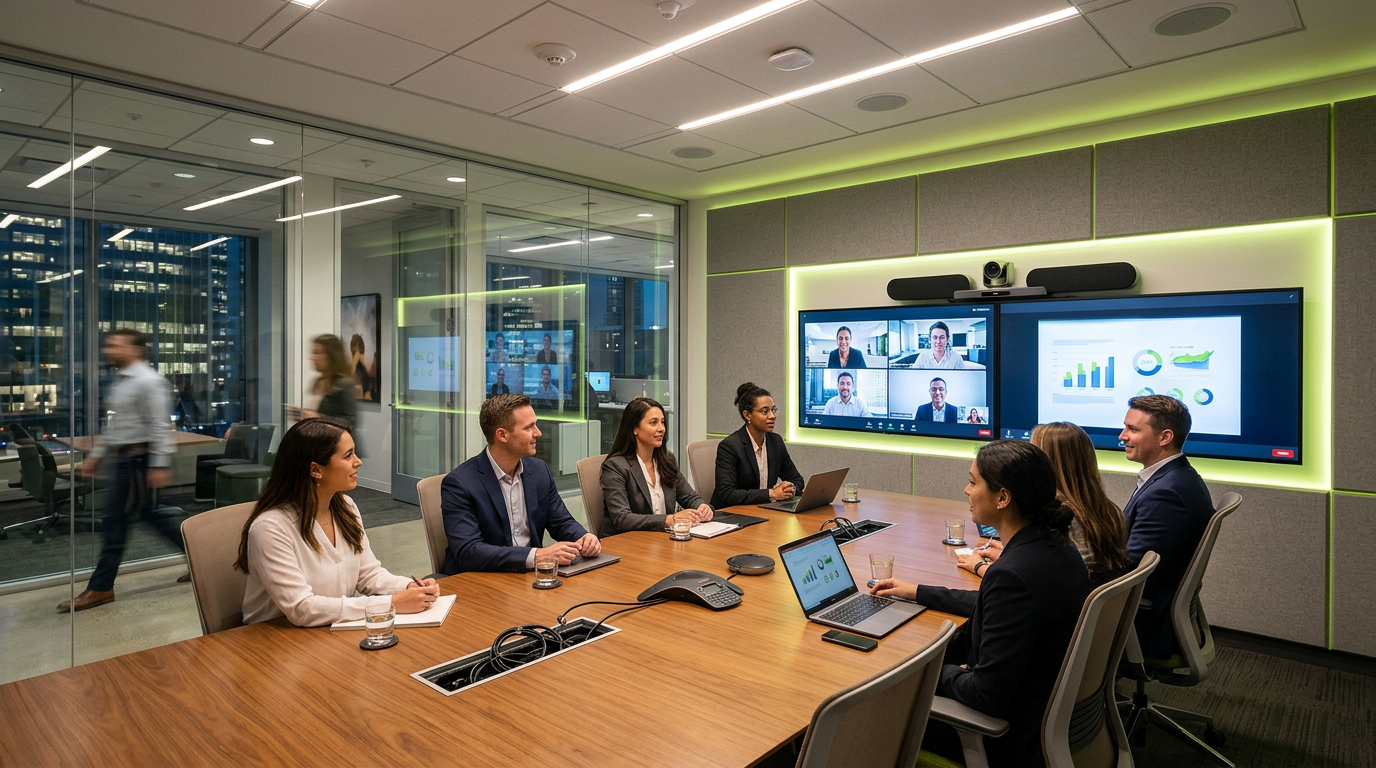
Good video conferencing room design starts with audio, not video: ceiling or table microphones matched to the room size, acoustic treatment to cut echo, a camera at eye level that frames every seat, displays sized to the farthest viewer, and a wired network connection for the codec. Most meeting failures trace back to poor acoustics or unreliable network, not the platform.
Quick Facts
- Audio first: echo and room noise ruin more calls than low-resolution video.
- Camera placement: at or just below the display, near eye level, covering all seats.
- Display sizing: larger rooms need bigger or dual displays so remote faces and content stay readable.
- Network: hard-wire the room system; don't rely on guest Wi-Fi.
- One-touch join: a room controller or scheduling panel cuts start-up delays.
The modern workplace has evolved, and the conference room is no longer just a physical meeting space—it is a digital bridge. However, we have all experienced the frustration of a high-stakes meeting delayed by "can you hear me now?" or grainy video that makes it impossible to read a whiteboard.
Setting up a reliable video conferencing room requires more than just a large TV and a webcam. It requires a thoughtful integration of hardware, acoustics, and network infrastructure. Here is how to build a space that works every time.
1. Prioritize Audio Above All Else
It is a common misconception that video is the most important part of video conferencing. In reality, a meeting can survive a video freeze, but it cannot survive poor audio. If participants can’t hear each other clearly, the meeting fails.
- Acoustic Treatment: Large glass windows and hard surfaces create echoes. Consider adding acoustic panels or heavy drapes to dampen sound reflections.
- Microphone Placement: For small huddle rooms, an all-in-one soundbar may suffice. For larger boardrooms, ceiling-mounted beamforming microphones are the industry standard, as they automatically track the speaker's voice while filtering out ambient noise like HVAC systems.
- Full Duplex Audio: Ensure your system supports full-duplex audio, allowing people on both ends to speak and be heard simultaneously without clipping.
2. Choosing the Right Camera and Field of View
The camera needs to fit the scale of the room. A common mistake is using a narrow-angle lens in a wide room, which cuts off people sitting at the ends of the table.
- Huddle Rooms: Use a wide-angle lens (120 degrees or more) so that everyone is visible even if they are sitting close to the screen.
- Large Boardrooms: Look for cameras with Optical Zoom and PTZ (Pan-Tilt-Zoom) capabilities. Features like Auto-Framing use AI to automatically crop the shot to the people currently in the room, providing a much more professional look.
- Eye Level Placement: Mount the camera as close to eye level as possible, usually just above or below the display, to maintain a natural line of sight.
3. Lighting: The Secret to Professional Video
High-end cameras still look poor in bad lighting. Shadows and backlighting are the primary enemies of a clear image.
- Avoid Backlighting: Never place a large window directly behind the participants. The camera will adjust for the bright light outside, leaving the people in the room looking like silhouettes.
- Front Lighting: Ensure the primary light source is in front of the participants. Consider installing diffused LED lighting panels that provide soft, even coverage across the table.
4. Simplified Control Interfaces
If a user has to juggle three different remotes to start a meeting, the system is too complex. The goal is a "one-touch join" experience.
- Touch Panel Controllers: Dedicated room controllers (like those for Microsoft Teams Rooms or Zoom Rooms) sit on the table and allow users to launch meetings with a single tap.
- BYOD Integration: Ensure there is an easy way for guests to plug in their laptops. A well-integrated Structured Cabling setup should include HDMI or USB-C table inserts, reducing clutter and cable failure.
5. The Backbone: Network Connectivity
Video conferencing is a bandwidth-heavy activity. Relying solely on guest Wi-Fi is a recipe for dropped calls and lag.
- Hardwired Connections: Always use a hardwired Ethernet connection (Cat6 or better) for the primary conferencing PC and the display system. This provides the low latency and stability required for high-definition streaming.
- VLAN Configuration: For larger corporate offices, it is best practice to place video conferencing equipment on its own Virtual LAN (VLAN) to prioritize traffic and ensure internal data transfers don't interfere with meeting quality.
6. Cable Management and Aesthetics
A professional room should look the part. Tangled wires on the floor are a trip hazard and a technical liability.
- Under-Table Routing: Use cable well-mounts or floor tracks to hide wiring.
- Equipment Racks: For complex setups with amplifiers and switchers, house the hardware in a ventilated rack behind the display or in a nearby closet.
Building for the Future
Technology changes quickly, but high-quality infrastructure lasts. By investing in professional-grade structured cabling and thoughtful AV placement now, you ensure that your conference room can adapt to the software updates and hardware upgrades of tomorrow.
Whether you are refreshing a single executive office or outfitting an entire corporate headquarters, focusing on these fundamentals will ensure your team spends less time troubleshooting and more time collaborating.
Frequently Asked Questions
What is the most important part of conference room design?
Audio. Clear microphones and controlled acoustics matter more than camera resolution for a meeting to work.
Where should the camera go in a video conferencing room?
Above or below the main display, close to eye level, so participants appear to look at remote attendees.
Do conference rooms need wired network connections?
Yes. A wired connection for the room system avoids the dropouts and lag common on shared Wi-Fi.
Who installs conference room AV in Orlando?
InCTRL Technology Services designs and installs conference room AV for businesses across Central Florida. See [audio visual services](/services/audio-visual) or [request a quote](/contact).
InCTRL Technology Team
Commercial integration specialists with 20+ years installing security, cabling, signage, AV and IT systems across Central Florida. About us
Explore our services
Areas we serve
Need This Done at Your Facility?
Orlando-based since 2004 — 3,300+ jobs completed. Talk to a real technician, not a call center.